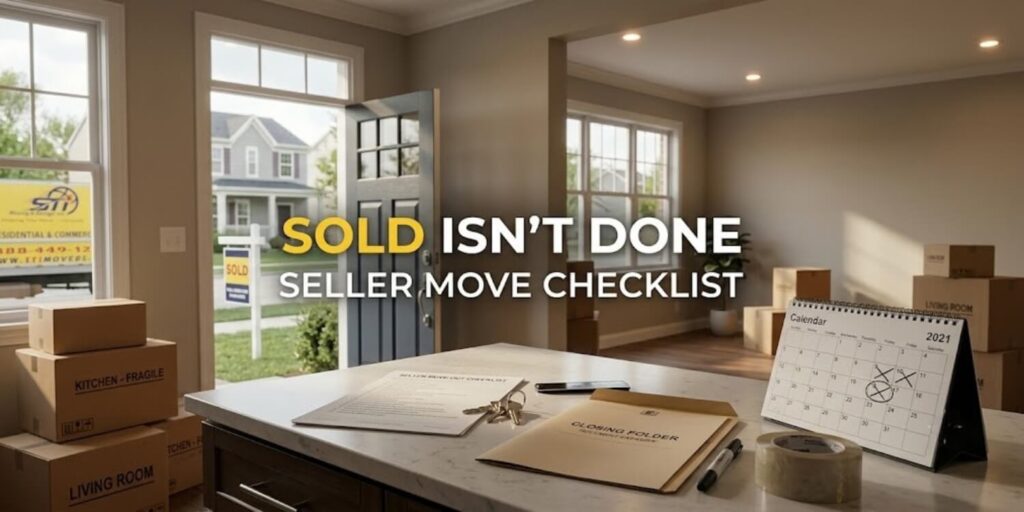
Moving can feel stressful and overwhelming, especially if you’re selling your home. There are many things to take care of, from choosing the right real estate agent to packing and organizing your belongings. This article provides sellers with a complete checklist for selling a house and moving, making it easier to manage the home-selling process while helping reduce the stress of moving.
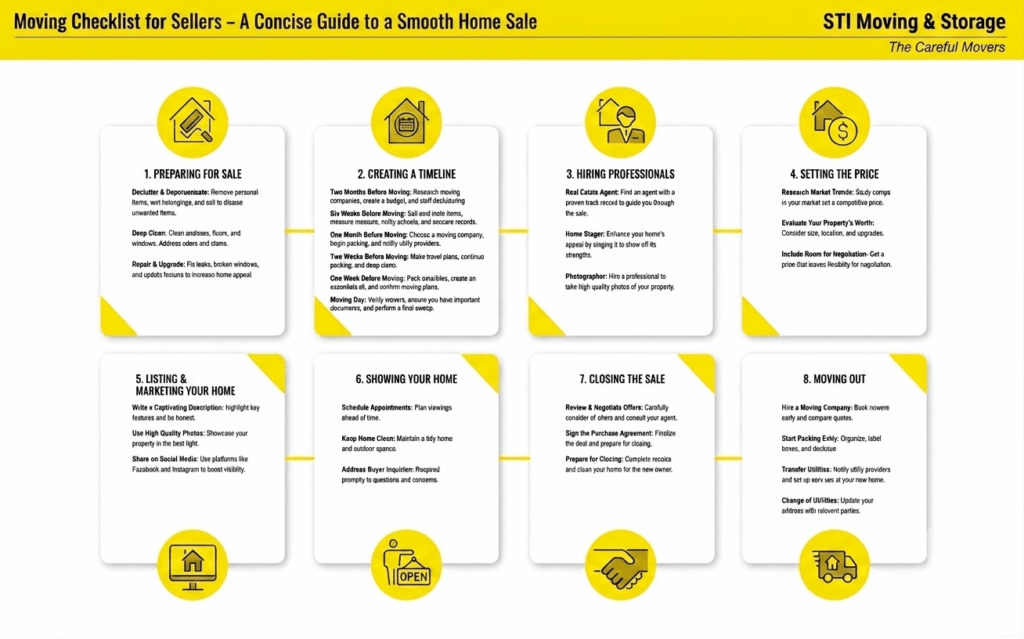
The moving checklist for sellers is divided into key milestones and tasks throughout the home-selling process. This organized guide helps ensure that no detail is overlooked and that every step is handled efficiently. From decluttering and staging the home to coordinating a smooth closing process, this checklist covers all the essential aspects of selling a home.
By using this checklist when selling a house, sellers can approach the home-selling process with confidence, knowing they have a well-planned and organized approach in place. This not only saves time and effort but also increases the chances of a successful home sale. Learn the essential steps and expert tips needed for a seamless home-selling experience.
Preparing for Sale
Getting ready to move starts well before a buyer visits your home or makes an offer. Make the process easier and create a great first impression by following these three important steps.
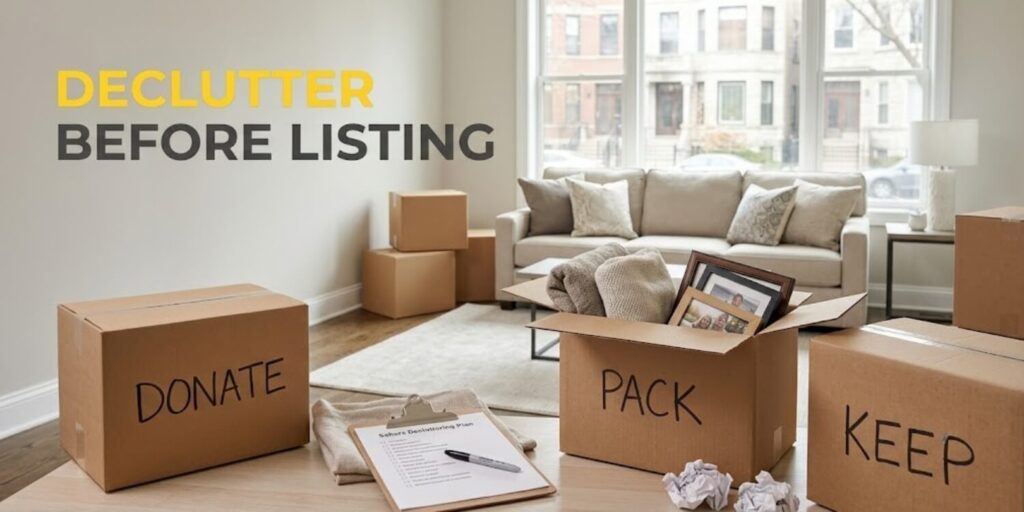
1. Declutter and Depersonalize
When getting your home ready to sell, start by decluttering and removing personal items. Put away things like family photos, keepsakes and other personal belongings, and organize the space to make it look clean and tidy. This helps buyers picture themselves living in the home, so creating a neutral space is important. Consider the following steps:
- Sort your belongings into “keep” and “don’t keep” piles.
- Sell unwanted items through a yard sale, eBay, Craigslist or Facebook Marketplace.
- Donate items you no longer need and keep the receipts for tax write-offs.
2. Deep Clean Your Home
Give your home a deep clean to make it look fresh and welcoming for potential buyers. Clean all surfaces, floors and windows, and take care of any stains or unwanted odors. Pay special attention to the following:
- Clean the kitchen and bathrooms thoroughly, making sure all surfaces are spotless and hygienic.
- Clean the carpets and floors, and steam clean or refinish them if needed.
- Dust the blinds and wash the curtains to keep the window coverings clean.
Finally, consider doing a “sniff test.” Invite a third party into your home, such as a friend or family member and ask them to let you know if they notice any strong odors, including pet smells, cooking odors, or potentially harmful scents like mold or mildew.
If they notice any odors, take some extra time to eliminate lingering smells by washing soft surfaces such as linens, curtains, furniture or carpets. You may also consider hiring a professional cleaning service to remove any persistent odors and help ensure a fresh, clean environment.
3. Repair and Upgrade
Before listing your home, take the time to complete any necessary repairs and consider making strategic upgrades to improve the property’s appeal. Inspect your home for any signs of damage and prioritize the repairs that will have the greatest impact on its value and appearance. Some repairs and upgrades to consider include:
- Fix leaky faucets, broken windows or damaged doors.
- Repaint rooms in neutral colors to attract more buyers.
- Replace outdated fixtures, such as light fixtures, hardware or appliances.
By taking the time to declutter, deep clean and complete any necessary repairs and upgrades, you can prepare your home for sale and help ensure it makes a great impression on potential buyers.
Creating a Timeline
Creating a moving timeline can feel overwhelming, especially since the time it takes to sell a house depends largely on local market conditions. For example, in a hot market, your home may sell within about a month, while slower markets may require more patience. Regardless of the market, having a flexible timeline can help ensure you and your family are prepared when the right offer comes in.
Establish an Ideal Moving Date
You may not be able to predict exactly when your home will sell, but work with your agent to determine an ideal moving date based on current market conditions and your personal timeline. For example, if you’re starting a new job and need to move within six weeks, regardless of whether your home has sold, be sure to let your agent know so they can plan accordingly. On the other hand, if you and your family plan to wait until your home sells before moving make sure your agent is aware of that as well.
Work Backward—and Keep Records
Once you’ve established your timeline, work backward from your target date to create a schedule for the next few months. Here’s an example schedule you can use as a reference.
|
Timeline |
Tasks |
|
Two months before moving day |
• Research local moving companies.
• Set a moving budget. • Create a moving folder on your computer or in a physical binder. • Sort through your belongings and get organized. |
|
Six weeks before moving day |
• Donate or sell items you don’t plan to keep.
• Start using up perishable items, such as frozen food, cleaning supplies, and cosmetics. • Let your friends and family know about your upcoming move. • Notify schools and gather school and medical records. • Measure large furniture to make sure it will fit through doorways and stairwells. |
|
One month before moving day |
• Choose a moving company and schedule your move.
• Begin packing non-essential items, such as small kitchen appliances, out-of-season clothing, extra linens, and toys. • Label every box clearly and accurately. • Notify utility providers and submit a change-of-address form. • Inform financial institutions, insurance providers, your company’s human resources department and any other relevant parties about your move. |
|
Two weeks before moving day |
• Make travel arrangements for your family and pets.
• Consider having your car serviced, especially if you’re moving long distance. • Continue packing, making sure to keep essential items easily accessible until moving day. • Begin deep cleaning your home. • Dispose of items you don’t plan to move, such as cleaning supplies or paint. • Request a day or two off from work for the move. • Confirm your moving day plans with your moving company. |
|
One week before moving day |
• Pack valuables and personal items separately for easy access.
• Refill any necessary prescriptions. • Prepare an “essentials kit” with items you may need when you arrive at your new home, such as pet food, snacks, children’s favorite toys or medication. Keep this kit with you instead of loading it onto the moving truck. |
|
Two to three days before moving day |
• Defrost your freezer.
• Review your moving day plans with your moving company. • Have cash available to tip your movers. • Make sure you have all important documents with you. |
|
On moving day |
• Confirm that your movers arrive on time.
• Do a final walkthrough of your home after the movers leave to make sure nothing has been left behind. |
Of course, you can adjust your schedule to fit your specific needs. Just make sure you have a clear, well-planned timeline to guide you throughout the moving process.
Hiring Professionals
When selling your home, working with experienced professionals can make the process smoother and more successful. This section focuses on three key professionals: A Real Estate Agent, A Home Stager & A Photographer.
Real Estate Agent
A skilled real estate agent will guide you through the entire process, from creating a moving checklist to closing the sale. Their expertise includes accurate pricing, effective property marketing and strong negotiation skills. To find the right agent:
- Interview multiple candidates and ask for references.
- Verify their licensing and experience.
- Review their track record and success rate.
Home Stager
A home stager helps make your property look its best for potential buyers. They will:
- Look at your home’s strengths and areas that could be improved.
- Suggest better furniture placement and ways to reduce clutter.
- Help make each room look more attractive.
To find a good home stager, you can:
- Ask your real estate agent for recommendations.
- Look for local home stagers with positive reviews.
- Schedule a consultation and review their portfolio.
Photographer
High-quality photos can make a strong first impression on potential buyers. A professional photographer will:
- Capture your home’s best features.
- Use proper lighting and angles.
- Edit the images to ensure they look their best.
To hire an experienced photographer, follow these steps:
- Browse their portfolio to evaluate their skills and style.
- Confirm their availability and pricing.
- Discuss your specific requirements and expectations.
Working with a real estate agent, home stager and photographer will help present your property in the best possible way, increasing its chances of selling quickly and at the right price.
Setting the Price
When selling your home, one of the most important steps is setting the right price. In this section, we’ll cover three key areas to help you price your property effectively: Researching Market Trends, Evaluating Your Property’s Worth and Leaving Room for Negotiation.
Research Market Trends
Before setting a price, research the current market trends in your area. Look at recent sales of similar properties, known as comparables (or “comps”), in your neighborhood. This will help you identify:
- The average sale prices of similar homes.
- The property features that affect price, such as size, location, age and condition.
- How quickly similar properties are selling.
You can find this information through online resources or by contacting a local real estate agent with access to the Multiple Listing Service (MLS).
Evaluate Property’s Worth
After researching market trends, the next step is to evaluate your property’s worth. Consider the following factors when determining your home’s value:
- Property size (square footage, number of bedrooms and bathrooms).
- Location (proximity to schools, parks, shopping centers and other amenities).
- The age and condition of the home (roof, plumbing, electrical system, etc.).
- Any upgrades and improvements that have been made.
- Buyer demand in your area.
A professional appraisal can provide an objective assessment of your property’s value. Alternatively, you can use online tools like Zillow’s Zestimate or consult a real estate agent for guidance.
Include Room for Negotiation
When setting your home’s listing price, it’s important to leave room for negotiation. This approach allows you to:
- Attract more potential buyers.
- Give yourself greater flexibility when negotiating with serious buyers.
- Handle any potential issues that may arise during the inspection process.
Keep in mind that pricing your home too high may discourage potential buyers, while pricing it too low could mean leaving money on the table. Aim for a fair price based on your research and property evaluation, while leaving some room for buyers to negotiate.
Listing and Marketing Your Home
It’s time to put your home on the market. Work with your real estate agent to create an attractive listing that showcases all the unique features and character your home has to offer.
Write a Captivating Description
When listing your home, create a compelling description that highlights its unique selling features. Take the time to research your property and identify its standout qualities. Write a clear, engaging description that showcases these features and captures the interest of potential buyers. Be honest and avoid making exaggerated or misleading claims.
Utilize High-Quality Photos
In today’s digital age, high-quality photos are essential for marketing your home effectively. Invest in professional photography to showcase your property in the best possible light. Focus on capturing the character of each room, the exterior and any standout features, such as a garden or pool area. Remember, first impressions matter and high-quality photos can help attract potential buyers.
Share on Social Media
Use the power of social media to reach a wider audience. Share your listing across platforms such as Facebook, Instagram, Twitter and LinkedIn. Be sure to include a compelling description, high-quality photos and relevant hashtags to attract potential buyers. Engage with your audience by responding to comments and sharing updates about open houses or other important events related to your home sale. This approach can increase your listing’s visibility and may help lead to a faster and more successful sale.
Showing Your Home
Showing your home to potential buyers is an important step in the moving process. Prepare yourself and your family for viewings by scheduling them as far in advance as possible, keeping your home clean and responding to buyer inquiries promptly.
Schedule Viewing Appointments
When showing your home to potential buyers, schedule viewing appointments in an organized way. This helps you manage your time effectively and stay in control of the showing process. You can use online scheduling tools or work with your real estate agent to arrange appointments.
Keep Your Home Clean and Presentable
Keeping your home clean and presentable helps create a positive impression on potential buyers. Before each showing, take some time to tidy up and give every room a quick clean. Consider the following tasks to help maintain a neat and inviting appearance:
- Remove clutter from surfaces and floors
- Vacuum and mop the floors
- Arrange furniture neatly
- Make the beds and fluff the pillows
- Put away personal items, such as family photos and toiletries
- Make sure the yard and outdoor spaces are well maintained
Address Buyer Inquiries
As potential buyers tour your home, they may have questions or concerns. Be prepared to answer their inquiries confidently and address any issues that may arise with accurate information. If you’re unsure about certain details, consult your real estate agent before providing an incorrect answer.
Responding promptly to buyer inquiries demonstrates your professionalism and willingness to sell your home. Maintaining a neutral and clear tone when discussing your property also helps convey transparency and trustworthiness.
Closing the Sale
When selling your home, there are several important steps leading up to the final closing. In this section, we’ll cover three key stages: Reviewing and Negotiating Offers, Signing the Purchase Agreement and Preparing for Closing.
Review and Negotiate Offers
When you receive offers on your home, take the time to review each one carefully. Pay close attention to the offer price, contingencies and the buyer’s financing arrangements. Consider the strengths and weaknesses of each offer before deciding whether to accept, counter or reject it. You can also consult your real estate agent for guidance throughout this process. Handle negotiations strategically to achieve the best possible outcome during the closing.
Sign the Purchase Agreement
Once you and the buyer have agreed on the terms of the sale, you’ll need to sign the purchase agreement. This legally binding document outlines the details of the transaction, including the agreed-upon price, contingencies and closing date. Be sure to review the agreement carefully before signing and consult an attorney if needed. By signing the purchase agreement, you are officially committing to the sale, so make sure you’re confident that the terms are favorable to you.
Prepare for Closing
As you prepare for closing, make sure you complete any requirements outlined in the purchase agreement. These may include:
- Completing any requested repairs or upgrades.
- Providing the necessary documentation.
- Making sure your home is clean and ready for the new owner.
Keep track of important milestones, such as the appraisal, inspection and the buyer’s loan approval. Communicate regularly with the buyer, your agent and any other relevant parties to help ensure a smooth closing process. Stay organized by using a checklist or calendar to track important dates and monitor your progress. With careful preparation, you’ll be well positioned for a seamless and successful closing.
Moving Out
Hire a Moving Company
Hiring a reputable moving company can greatly reduce the stress of moving out. Start by researching local moving companies and comparing their services, prices, and reviews. To find the best option, request quotes from at least three different companies. Once you’ve chosen a company, book them well in advance to ensure they’re available on your preferred moving date. Also, confirm that the moving company is properly licensed and insured to help protect your belongings.
Start Packing Early—and Use Efficient Packing Strategies
Starting the packing process early can help you avoid last-minute stress and make your move go more smoothly. Consider the following strategies for a more efficient packing process:
- Start by decluttering your home, separating items into “must-have” and “don’t need” piles.
- Consider selling, donating or disposing of unwanted items to make your move lighter and more efficient.
- Set aside enough time to pack each room carefully, starting with the least-used rooms and working your way to the areas you use most often.
- Label every box with its contents and the room it belongs in to make unpacking easier at your new home.
- Keep clothing on hangers and cover them with garbage bags to protect them during transit.
Transfer Utilities
Be sure to notify your utility companies at least 30 days before your move so they can disconnect service at your current home. Check with your existing providers to make sure there are no outstanding fees. Then, contact your new providers to ask about any required deposits and schedule service activation at your new home.
In addition, remember to return any rented equipment to your service providers, such as WiFi routers or cable boxes.
Create Change of Address Notifications
Visit your local post office or update your address online. You can also request mail forwarding for any mail in transit to help prevent it from getting lost during the first few weeks after your move.
Notify Important Parties
Informing the right people about your move is an important part of ensuring a smooth transition. Start by updating your address with the post office, utility providers, banks and other financial institutions. Also, notify your employer, your children’s schools, your doctors and any subscription services about your upcoming move.
Don’t forget to share your new address and contact information with friends and family so they can stay in touch. Communicate with your real estate agent or landlord to complete any necessary paperwork and arrange the transfer of keys to the new owners. By making sure all important parties are informed about your move, you can help minimize potential issues and avoid missed communications during the transition.